How to Add a New Shipment in Trulos Dispatch
This guide walks you through creating a new load in Trulos Dispatch—from selecting a customer and entering origin & destination details to adding products, carriers, equipment, and optionally posting the load to the Trulos Load Board.
Applies to: Trulos Dispatch web app · Roles: Dispatcher, broker, shipper.
Trulos Dispatch is free truck dispatch software that helps freight brokers, carriers, and shippers manage freight and run their business efficiently. Every load in your workflow starts as a shipment. Once it’s created, you can dispatch carriers, generate paperwork, create invoices, and track margin.
The very first step is to create a customer. After that, you can add shipments for that customer on a recurring basis, making repeat loads quick and easy. During shipment entry, you can also choose whether to post the load to the Trulos Load Board.
In this guide you'll learn how to:
- Create a new shipment from the main admin page
- Select a customer and manage saved addresses
- Add origin, destination, and product details
- Assign a carrier, equipment, and pricing
- Post (or not post) the load to the Trulos Load Board
Quick navigation
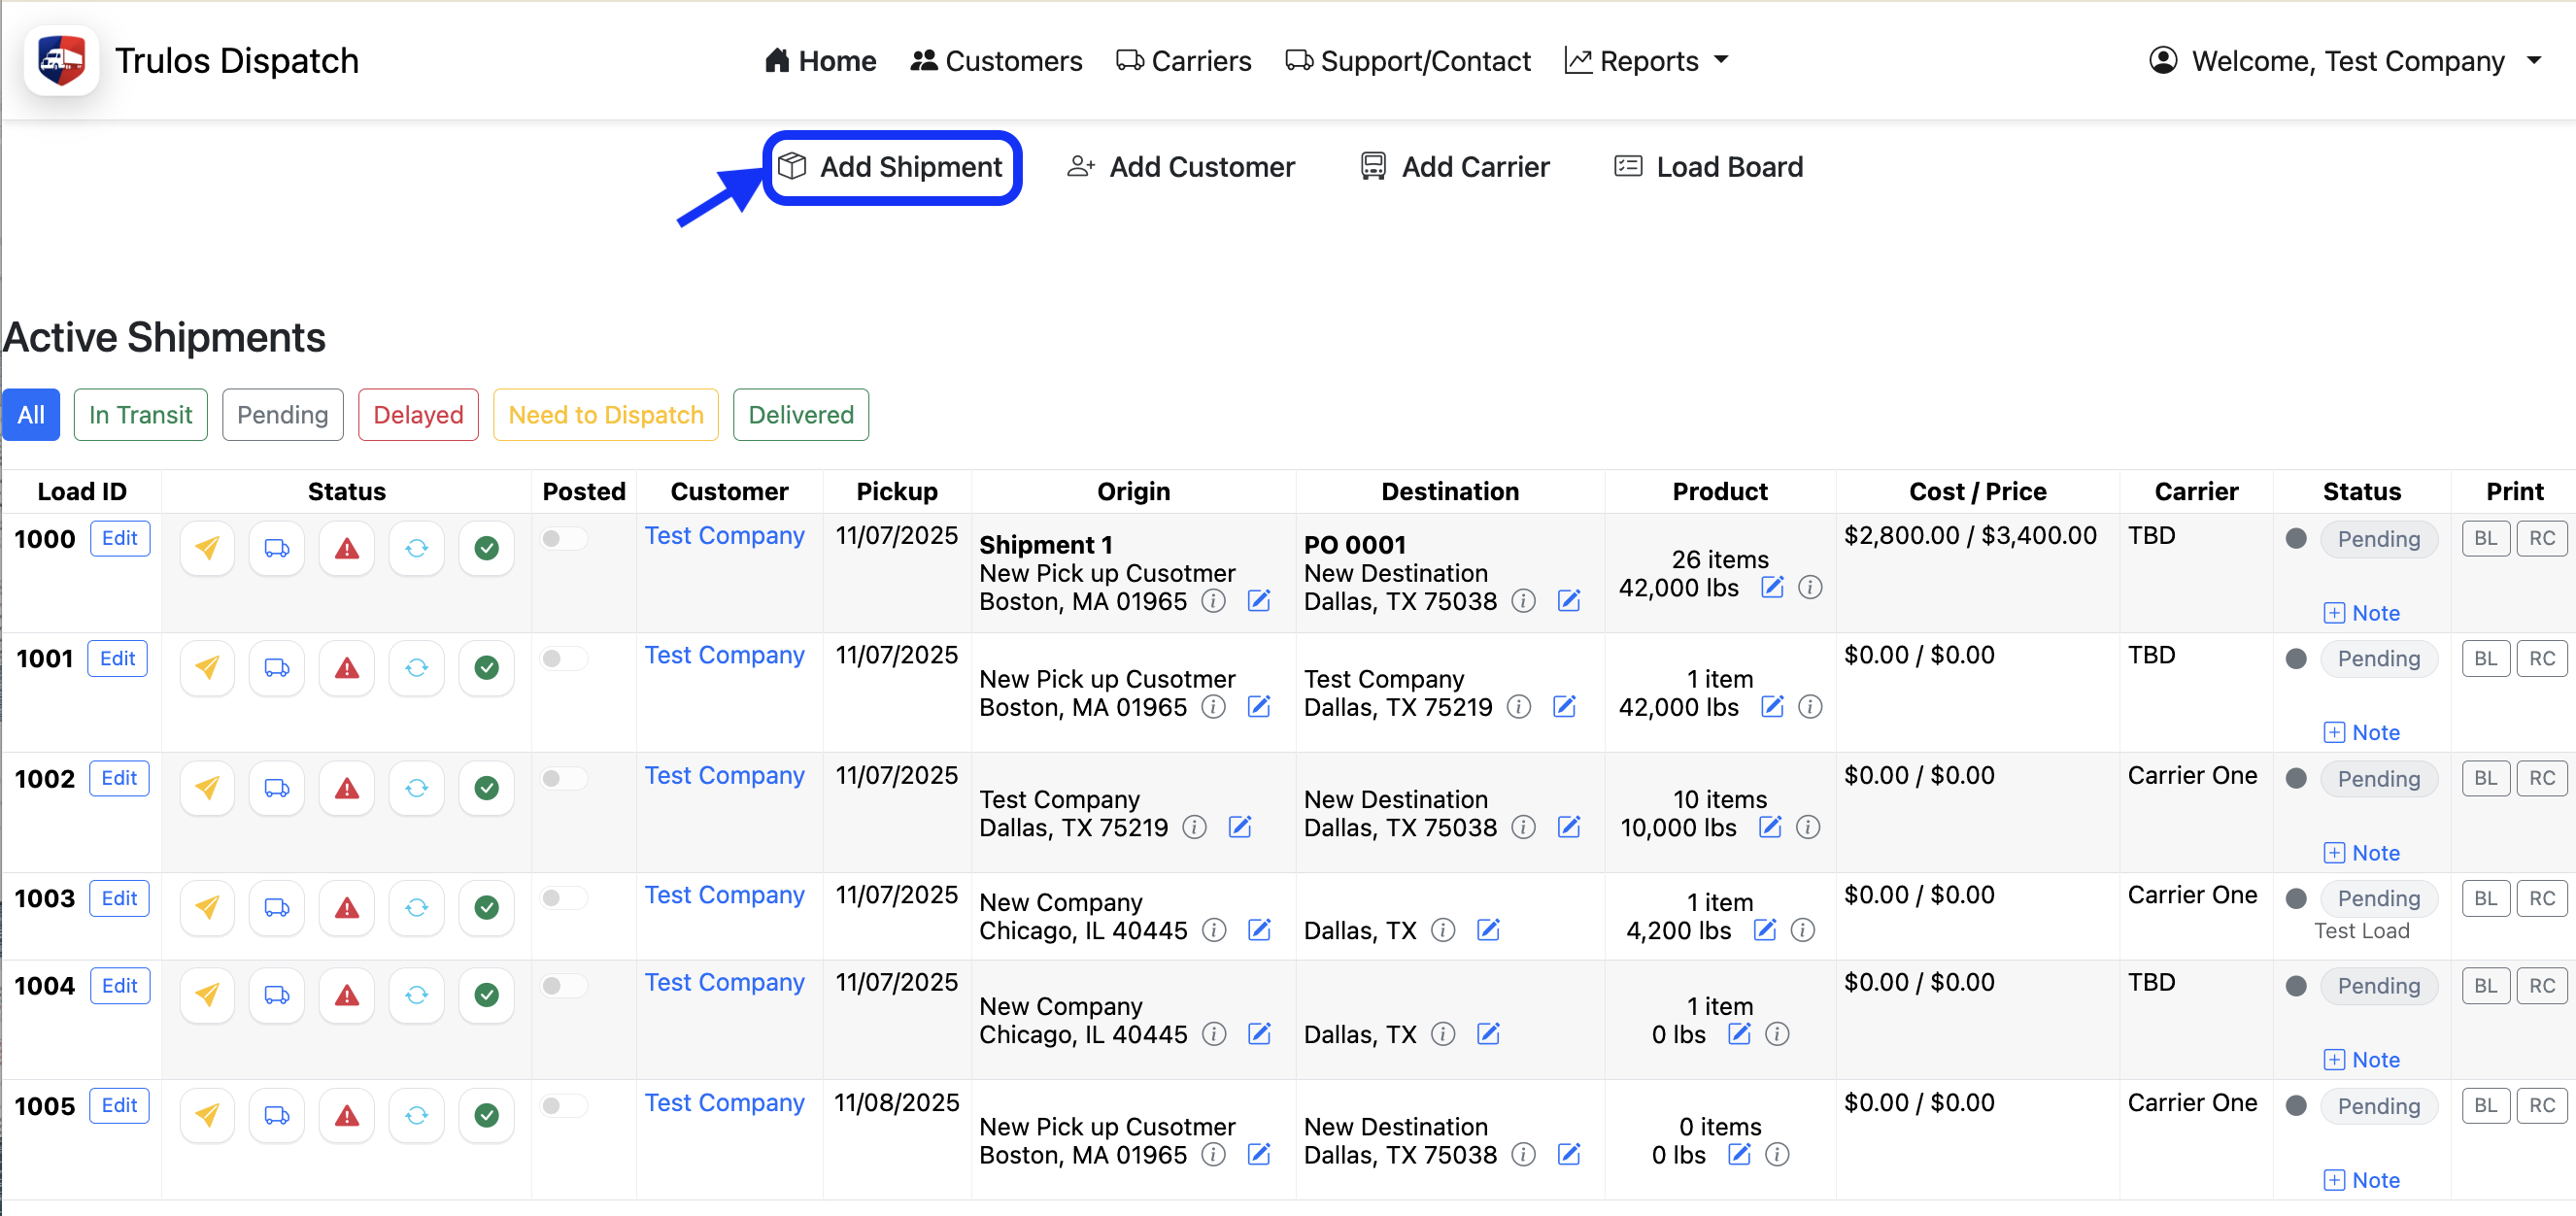
Step 1 – Open the Add Shipment window
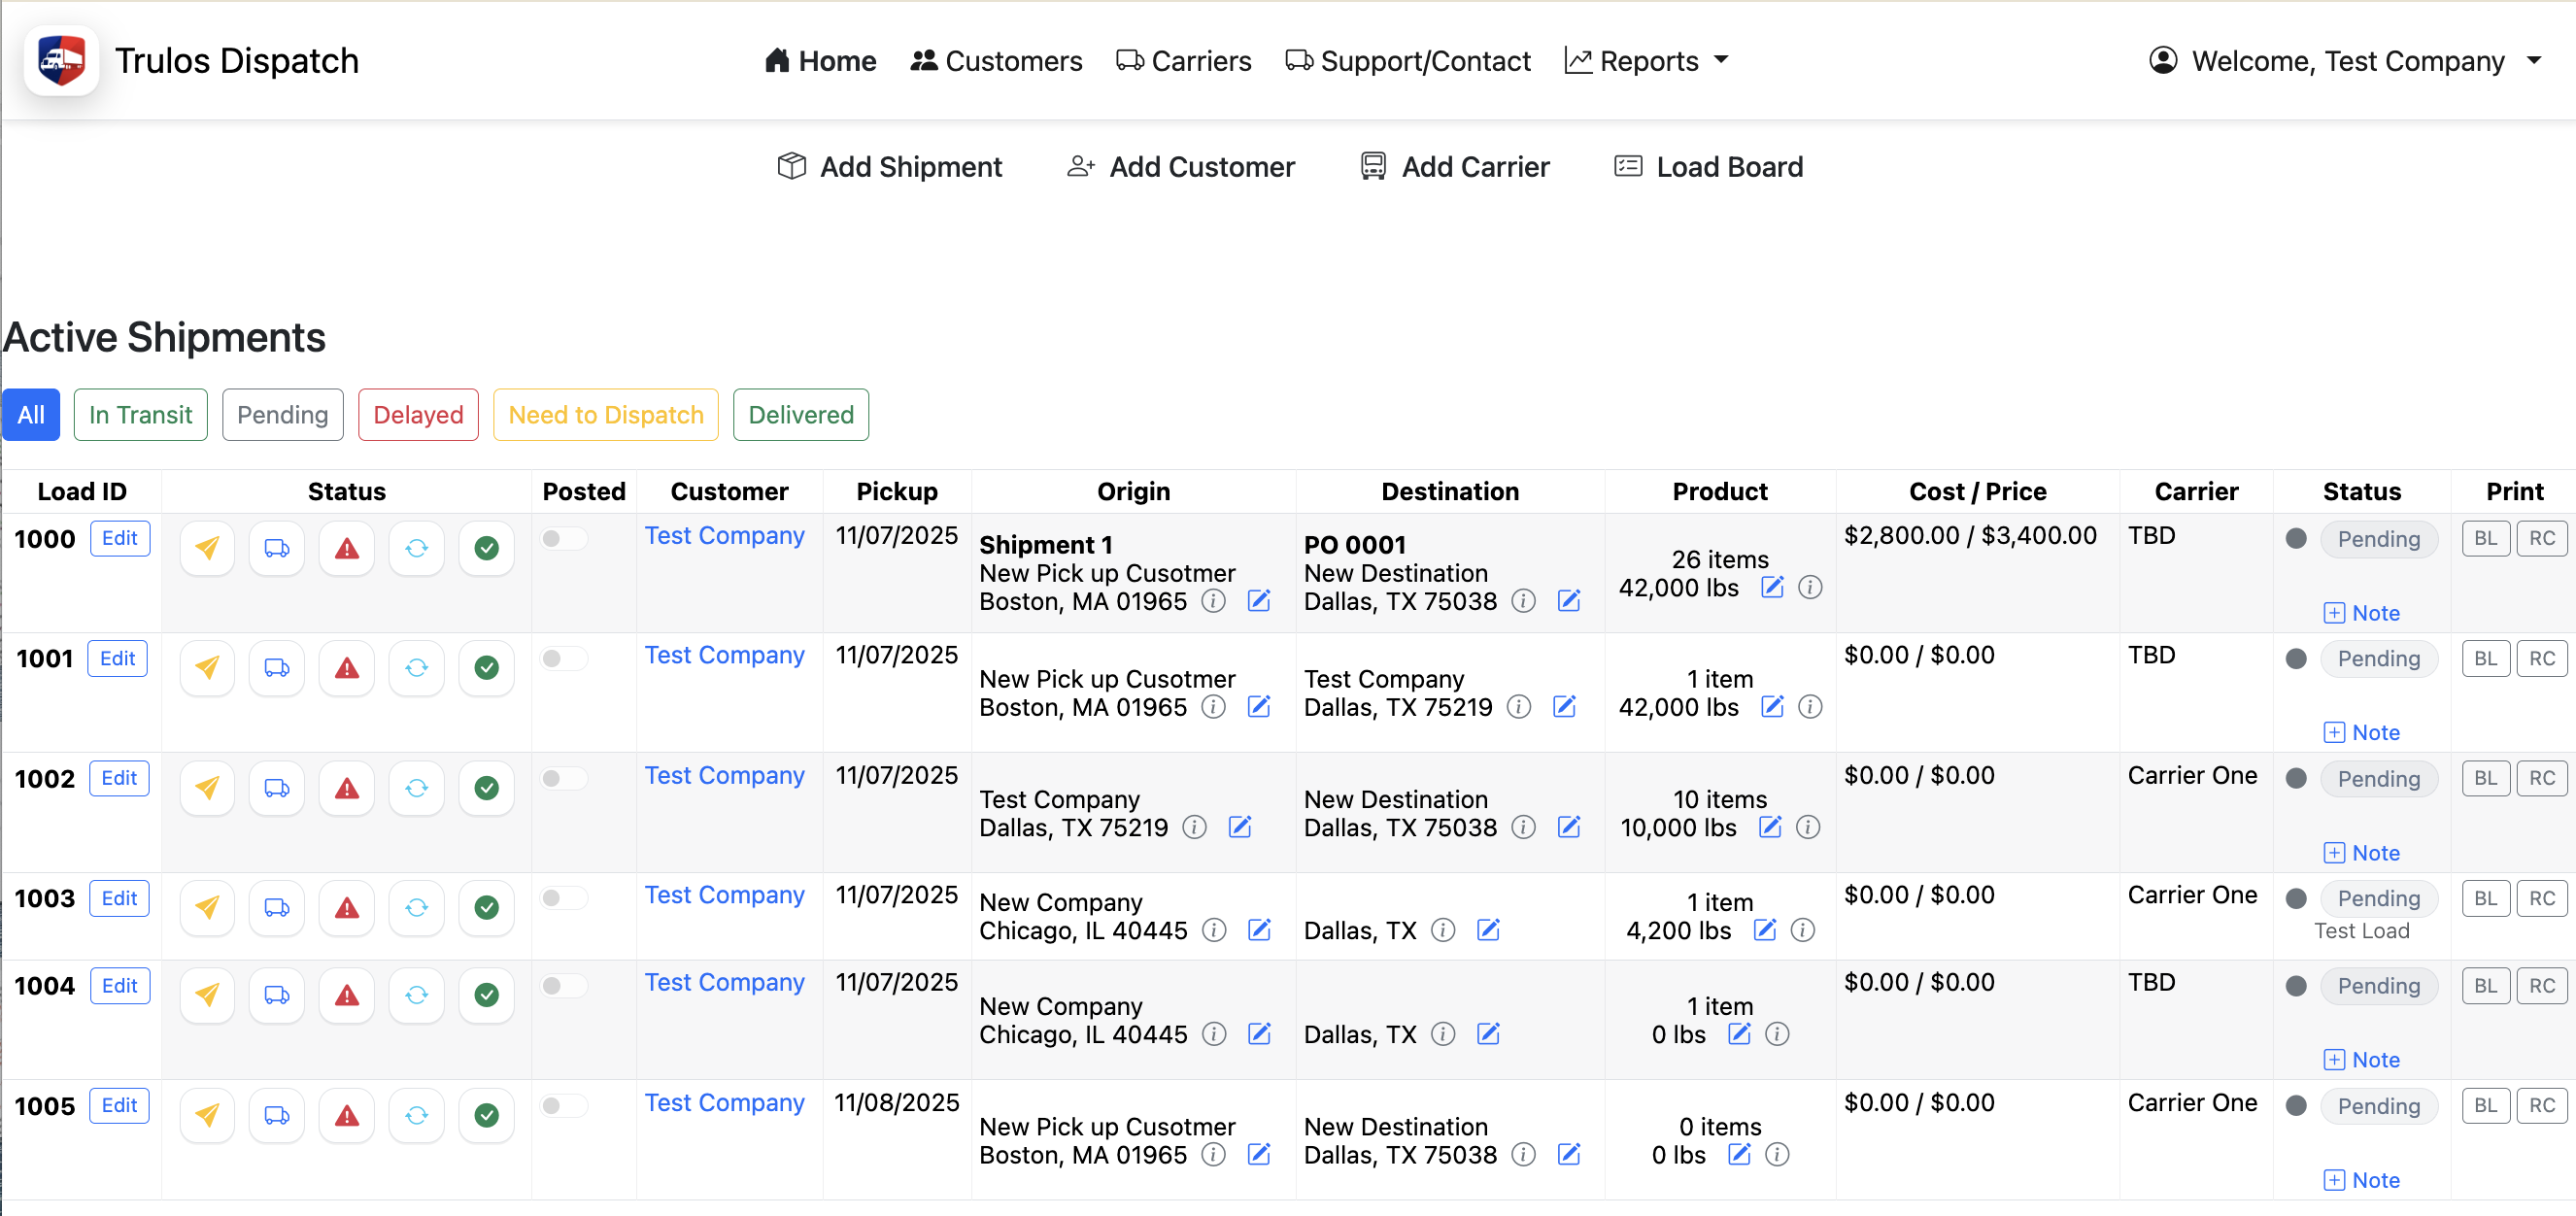
From the main Dispatch admin page, click the Add Shipment button at the top of the screen. This opens the shipment entry window where you'll enter all details for the load.
Step 2 – Select or add a customer
At the top of the Add Shipment window, choose the customer this load belongs to. Start typing to search, then select from the list.
If you haven't created the customer yet, click Add Customer directly from this window to create one on the fly.

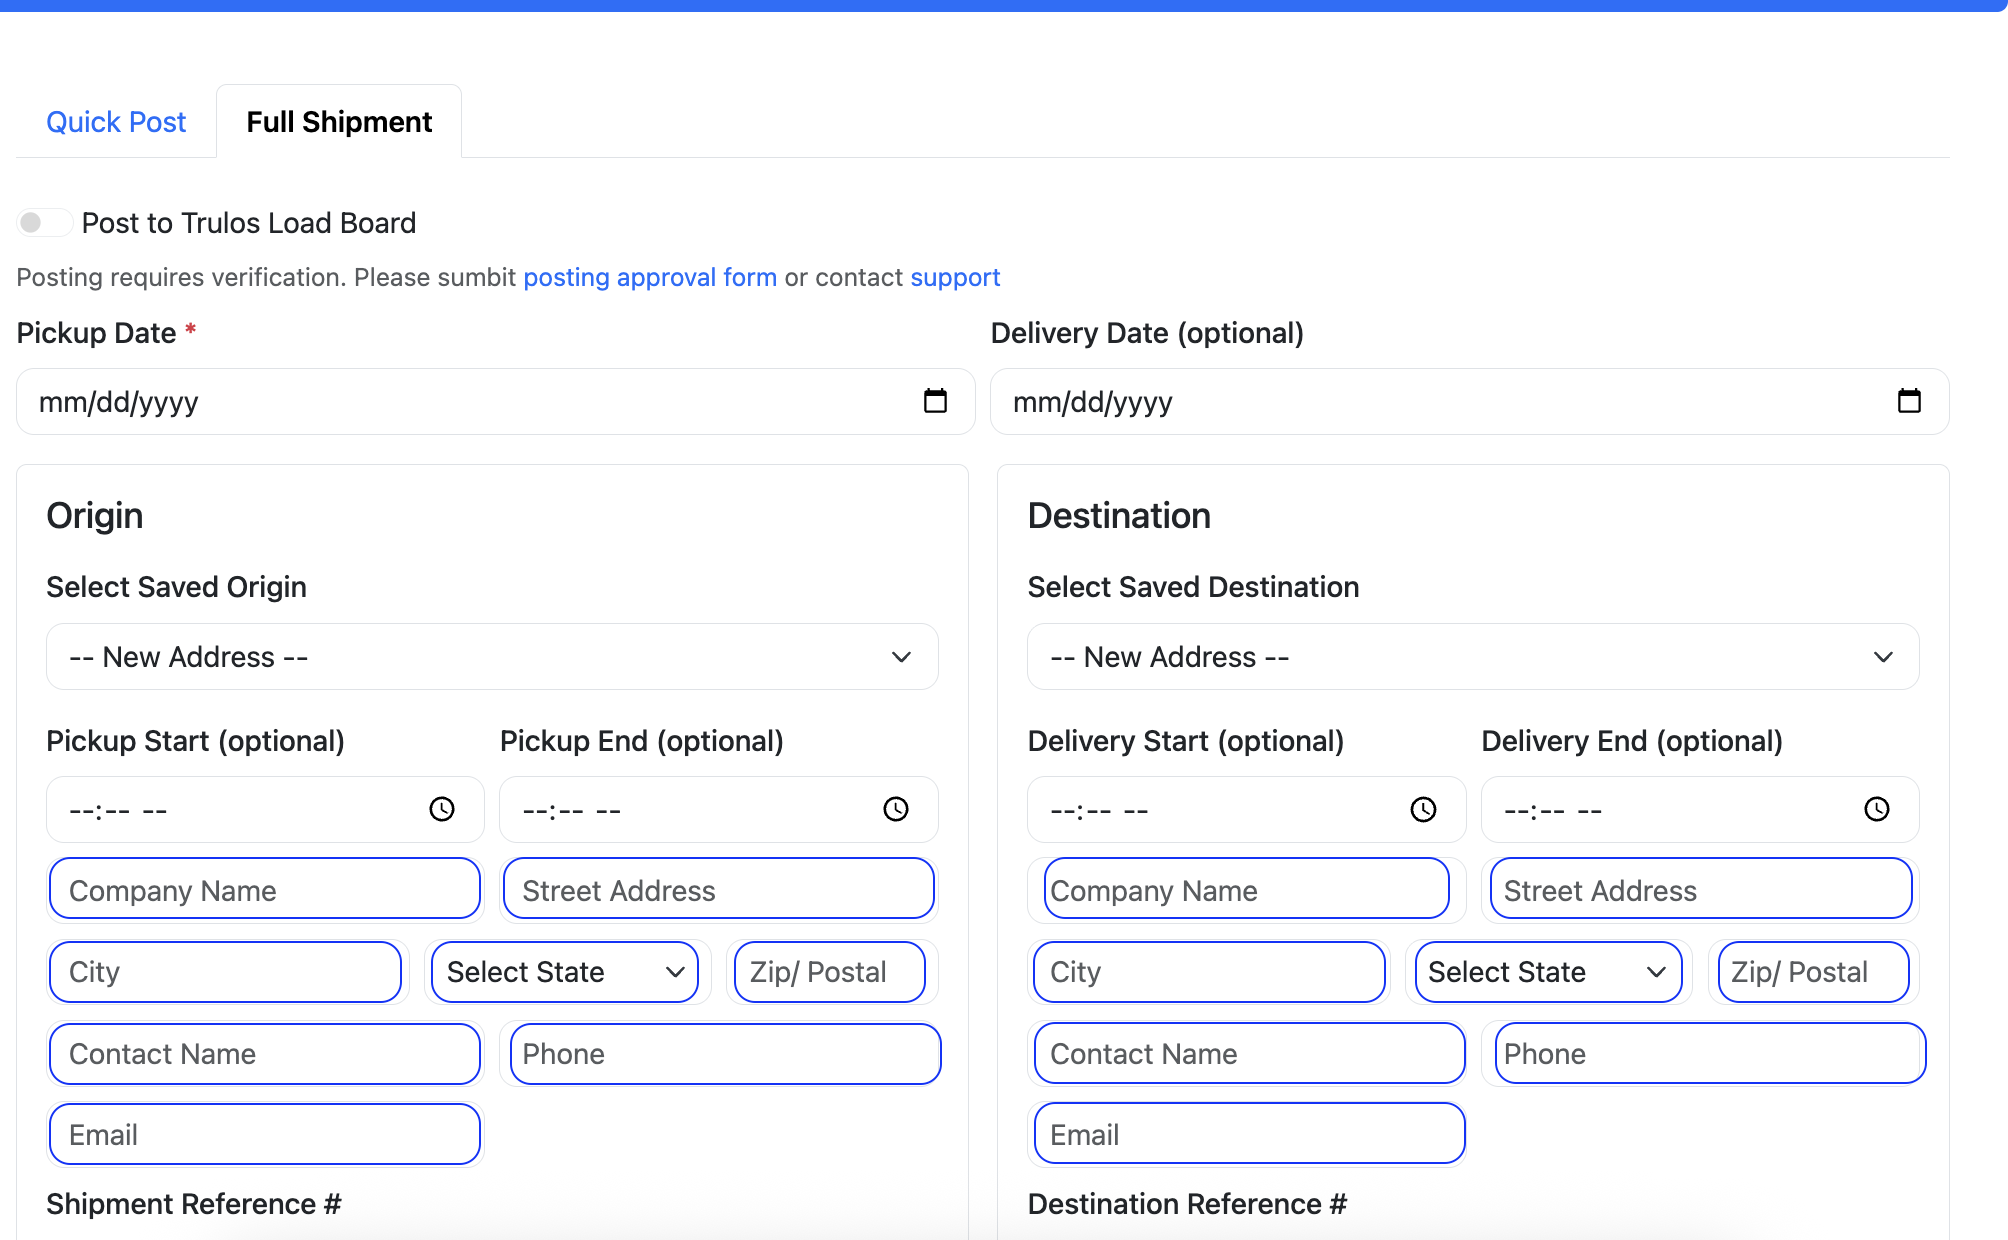
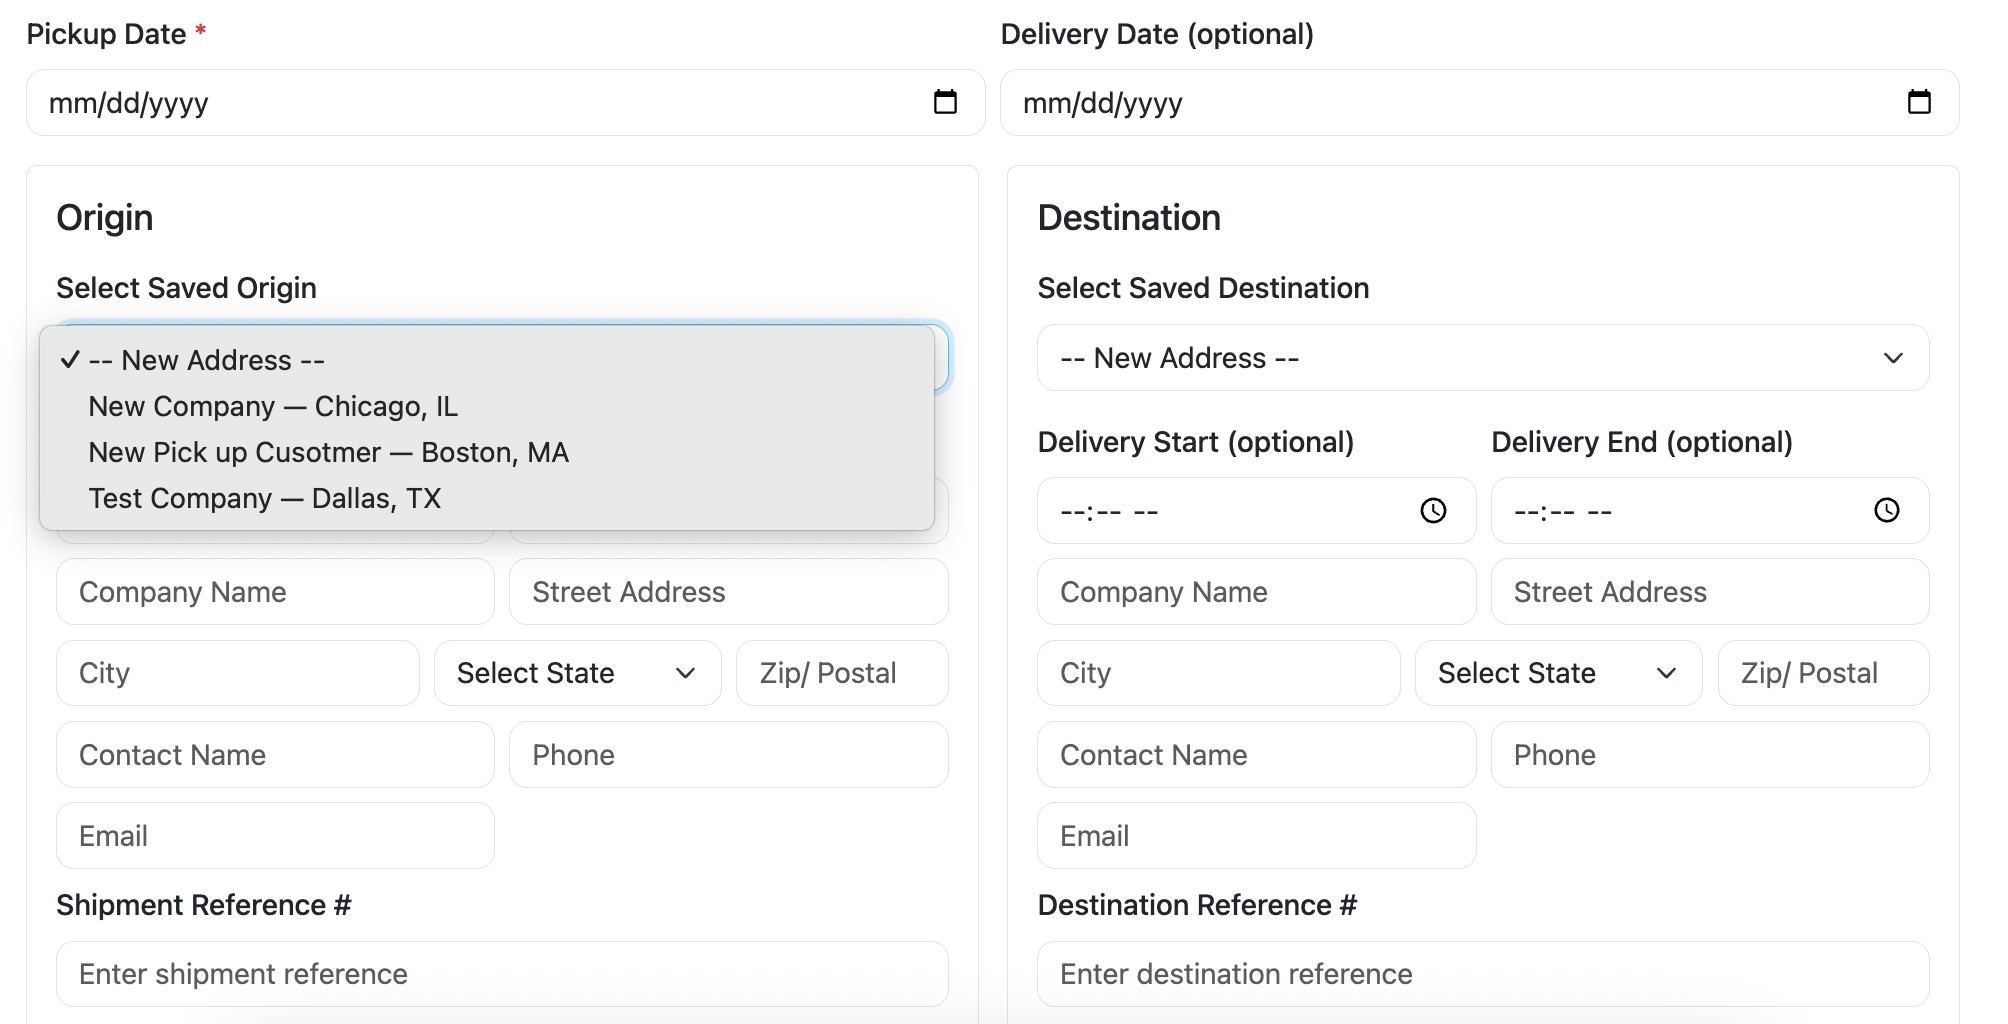
Step 3 – Enter origin & destination details
Next, enter the origin and destination information for the shipment. You can either type in a new address or select from your previously saved address list.
Once you use an address for a shipment, it's automatically saved so you can reuse it later. If your list gets cluttered, you can deactivate older addresses rather than deleting them.
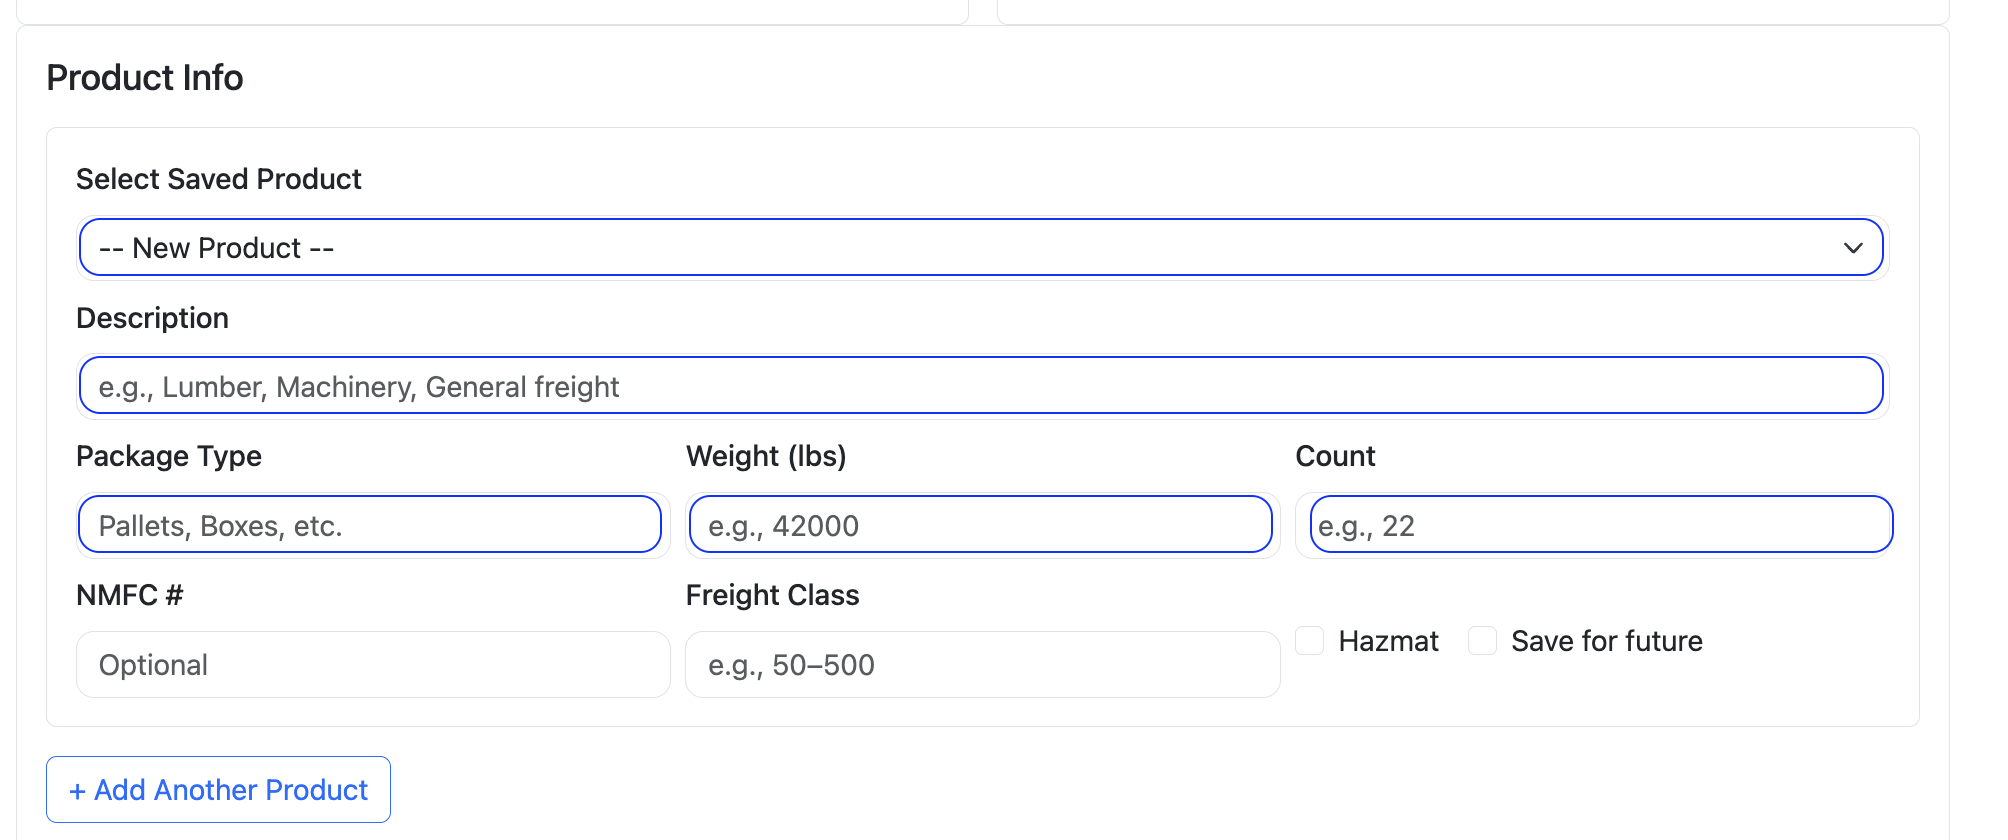
Step 4 – Add product details
In the Product Details section, describe what is being shipped. At a minimum you'll usually include weight, piece count, and a short description.
If this is a product you ship often, you can choose to save the product so it's available from a list next time. You can also add multiple product lines to a single shipment.
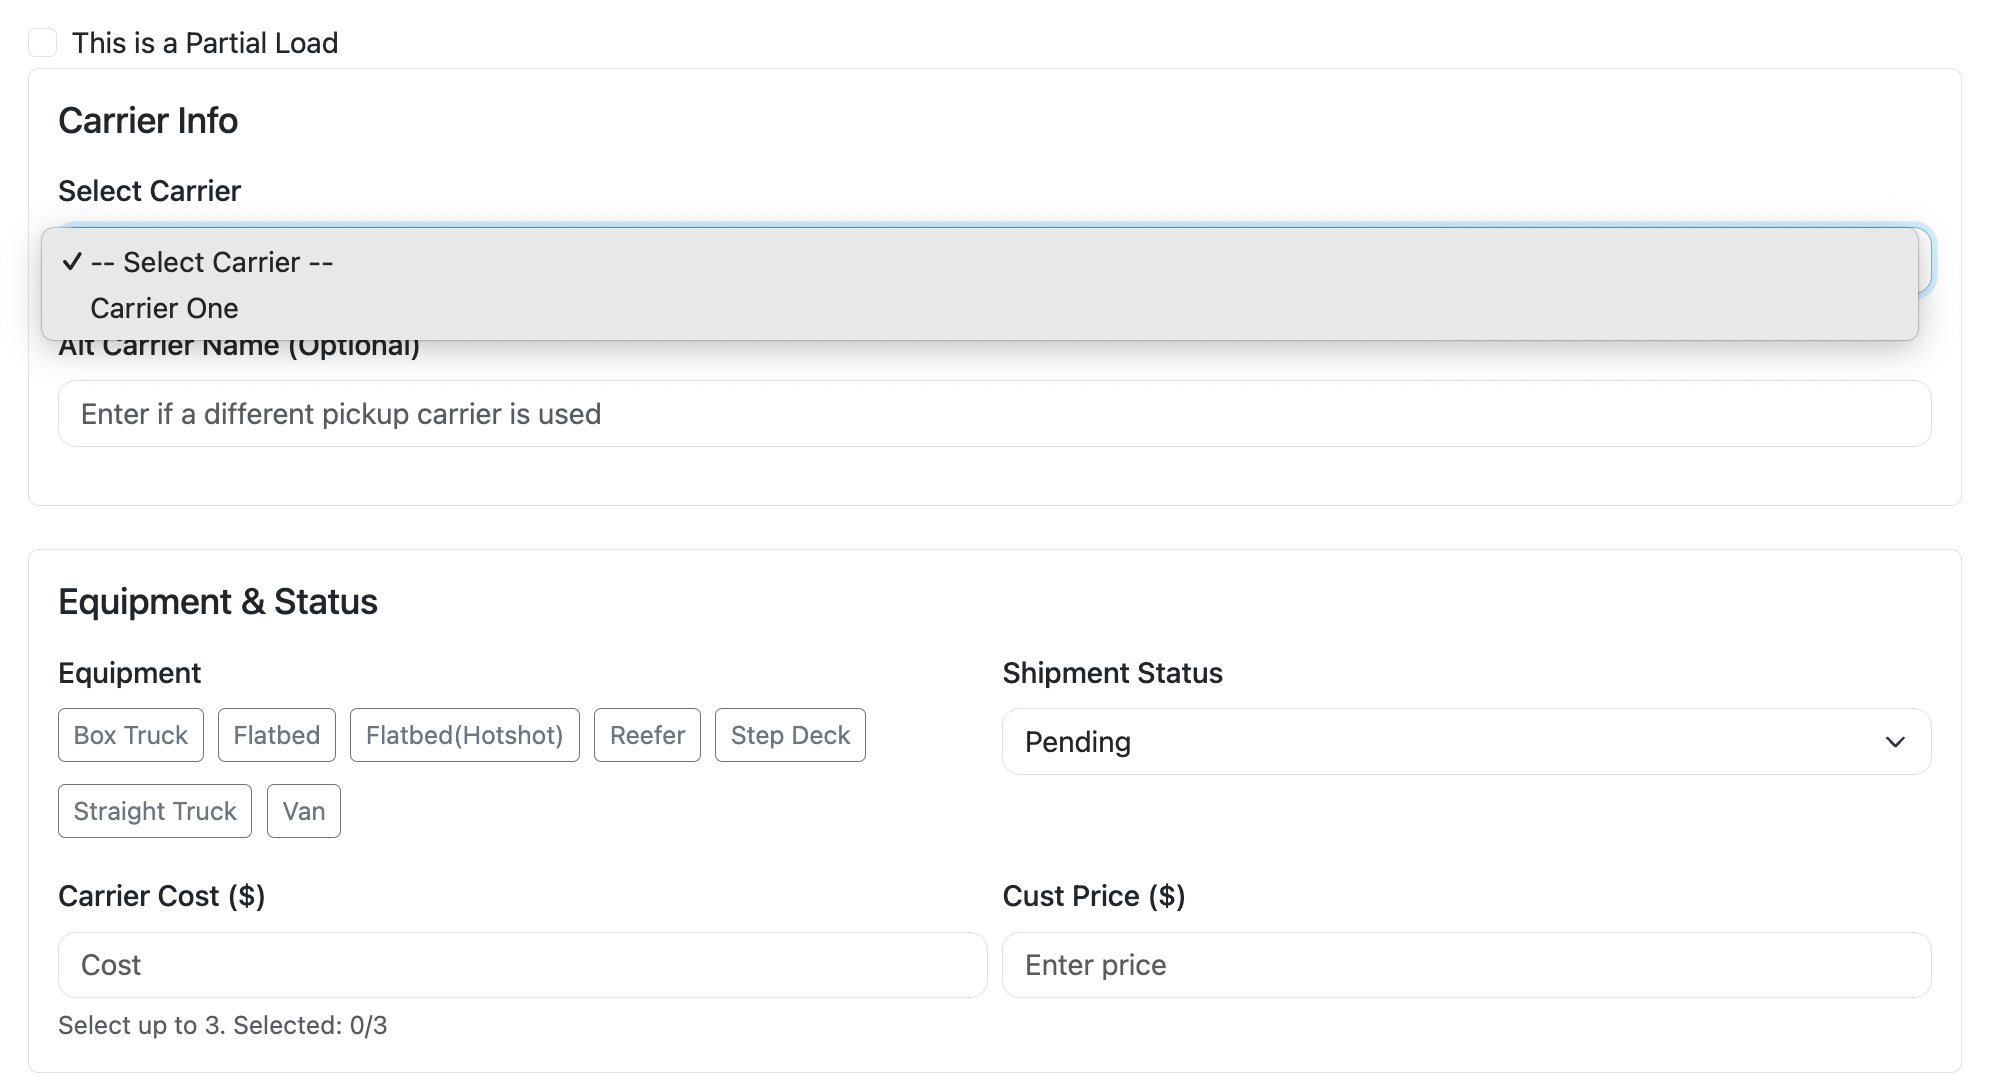
Step 5 – Add carrier, equipment, cost & price
In the Carrier section, select the carrier you're assigning to the shipment. If you haven't set them up yet, you can come back and add the carrier later—your shipment will still be saved.
Choose the appropriate equipment type. Trulos Dispatch lets you select up to three equipment types for a single shipment, which is helpful when a load can move on multiple equipment types.
Finally, enter your cost (what you pay the carrier or driver) and price (what you bill the customer). Trulos automatically calculates your margin and surfaces it in your company metrics.
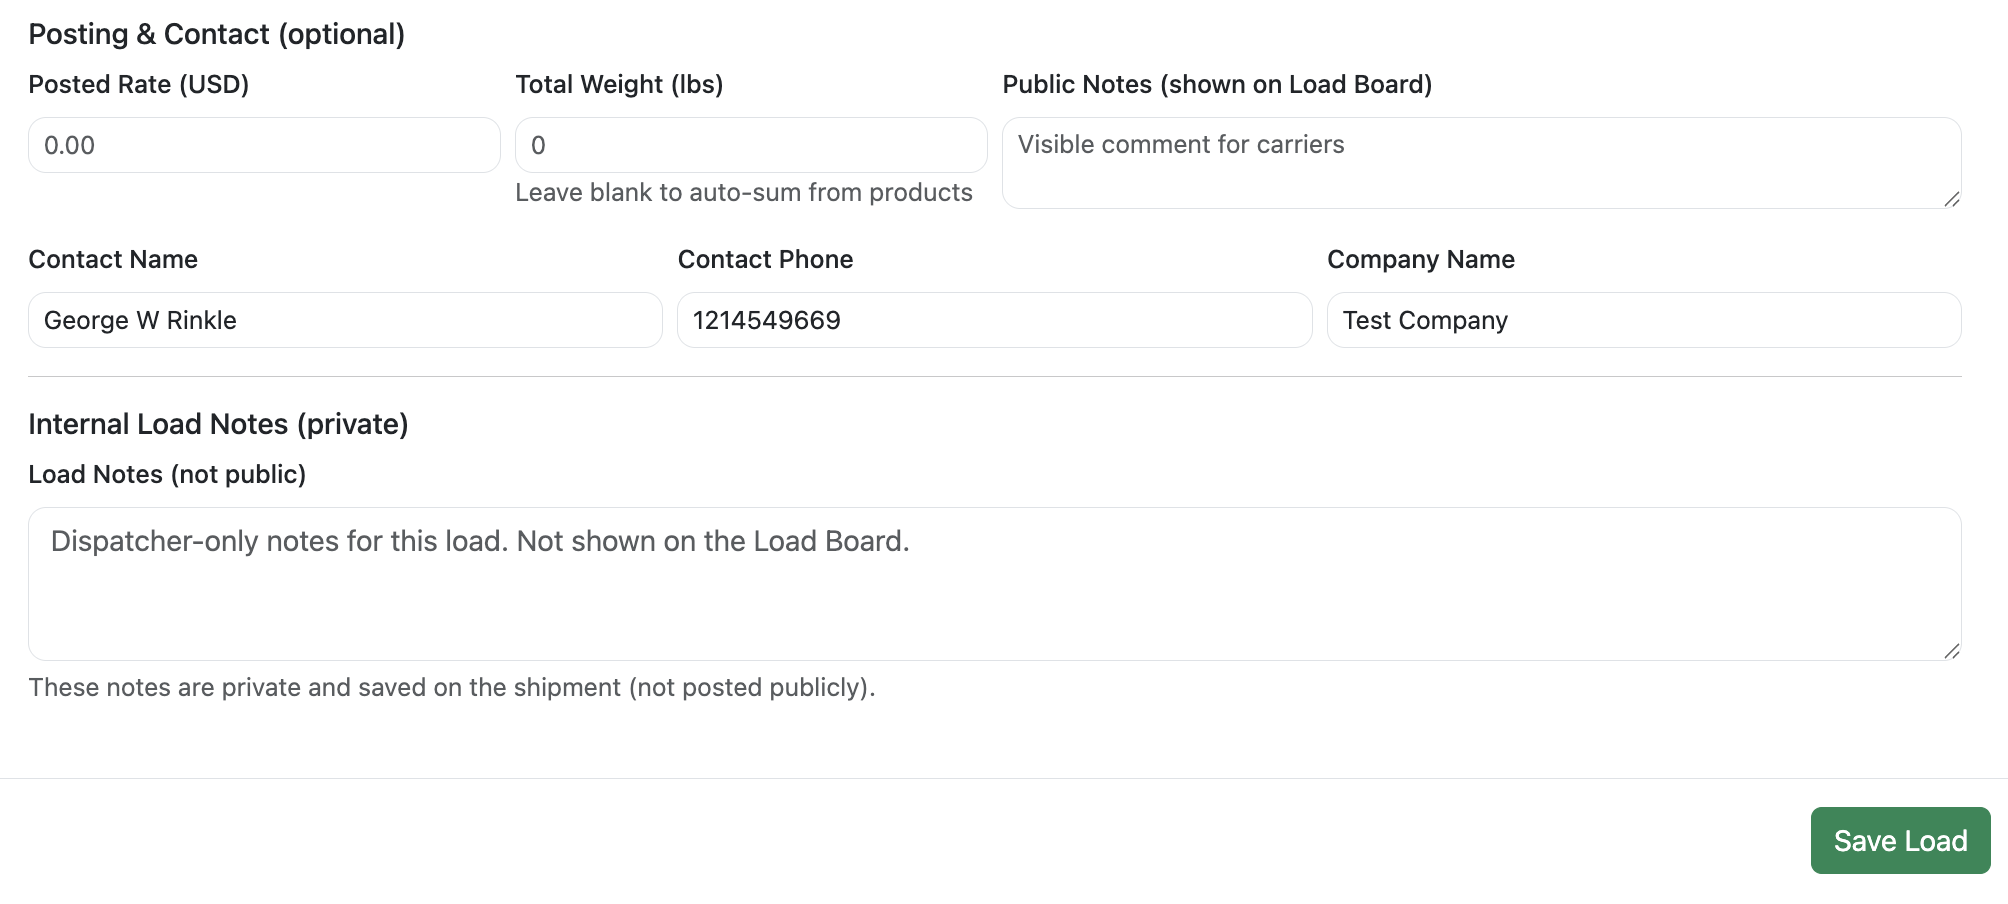
Step 6 – Optional: post to the Trulos Load Board
Within the Add Shipment window, you'll see an option to post this load to the Trulos Load Board. By default, the toggle is set to not post. Turn it on if you want the load to appear on the public Trulos board for carriers to find.
Even if you leave it off here, you'll still have the ability on the main Dispatch page to post or un-post the load with a single click.
Step 7 – Review and save your shipment
Once you've filled in customer, origin, destination, product, carrier, and any posting information, take a quick moment to review the details.
When everything looks good, click Save. The window will close and you'll see your new load on the main Dispatch admin page, ready for dispatching, paperwork, and invoicing.
Need help or have questions?
If something doesn't look right or you'd like help getting your workflow set up, reach out to our support team. We're happy to walk through your first few loads with you.